

The MyFit Tee comes with multiple neckline options, but what if you wanted a V neck instead? This hack is going to be demonstrated using the MyFit Tee, but will work for most T shirt patterns.
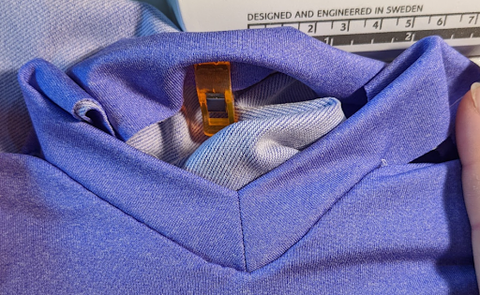
It all started with this picture.

I realized I make almost every tee I make into a V-Neck, and I’ve got the process that works for me pretty figured out! It may take a bit of practice but I promise you can make beautiful V-Necks with only a TINY amount of math.
We’re going to start by cutting out our shirt. I start with the front and this is where I adjust the neckline. Choose how deep you want your vneck. I like the high crew as the base for this, but a lower V-Neck works exactly the same. We’re now going to draw a new curve following the line as per the images below. Mine ended up a bit deeper but it’s all good =)

You can practice cutting this on paper, or using a marker but I find it’s totally doable on the fly with a roller cutter.

Finish cutting out your back and sleeves, making sure you cut the back on the same line you started your front neckline (so in my version the high crew neck) so that the shoulders line up. The next thing we need to do is cut the new neckband!
Start by checking the width of your neckband on your original pattern - this is written on the band pattern piece. 2” works well with a ⅜ Seam allowance but since we choose our own in the generator you may want to adjust accordingly.
Next we have to measure our new neckline, I do this just on my mat using my finger to pivot.


This is where we do math - don’t worry it’s not that precise and there’s room for error. I measured 10” for the back and 17” for the front. My fabric is good stretchy with decent recovery, so unless it has super strong recovery I use 85%. If your fabric is a super strong athletic fabric, you can try 90%, and if it’s a very loose knit you can decrease this. It may take one or two tries but 85% works for me almost every time.
So the math:
Neckline length measured * 0.85 + 2”
For mine : 27*0.85+2” = 24.95 - I’m going to round this to 25. I always round to the easiest number to cut, there’s flexibility.
The 2” is for the V we’re going to cut into the end, make sure you add it after finding 85% of the length.
I’ve made a little calculator that does this for you, Imperial:
Metric:
If you’re working in cm, add 5cm for the V instead of 2”, the calculator above does this for you =)
To shape the “V” we’re going to find the centre of the band we just cut and mark a line as below - make this line half the width of your band. For my 2” band that’s a 1” long line.

After finding the centre, I use the 45 degree mark on my ruler to line up with the line we just drew. If you don’t have a quilting ruler you can measure from the top of your line to the corner and cut that way. We’re going to remove this triangle now.


Whew! We made it through all the math! We cut everything out! It’s FINALLY sewing time!
Follow the instructions for your shirt until you get to the neckband.

We’re going to start by sewing the point we cut out of the neckband, using a ⅜ “ or 1 cm seam allowance and a straight stitch (this is important for a nice sharp V!) Drop your needle in the centre and pivot. Snip in the middle as close to your stitches as you can.

We’re then going to fold the neckband length-wise, wrong sides together. We’re going to open the seam allowance of the V and line them up together. You can iron your neckband here, it makes the following steps easier. (I never iron so I won’t be doing that here =P )

This is also a good time to do two things:
- Quarter your neckband and neck opening
- Check to see if your seams are lined up, I do this by inserting a pin and seeing if it comes out in the seam on the other side.


Next line it up with the neckline! Use a pin and make sure you can see the pin from the wrong side of the shirt. We also want the pin/neckband as straight and vertical as possible

I now pivot the band and clip one side about an inch away - we’re going to sew one side at a time.

Using a basting/long straight stitch on a sewing machine start sewing from about 1” away from your centre pin. I find it makes a much cleaner V-neck band if I sew with the shirt on top of the band - it prevents the shirt from bunching up or gathering funny.

When you get to your pin, go slowly, hand crank if necessary and drop your needle at your pin, lift the presser foot and pivot to go down the other side. At this point make sure you adjust the shirt body so it’s smooth under your needle.

When finished basting, take a look and see how it looks on both sides. If it’s not super crooked, and looks good on both sides we get to move on! If not, adjust and rebaste until satisfied. This shirt took me two tries, but it’s taken me many more than that.
If you’re really patient you can hand baste this in instead (keep in mind your seam allowance!) I find the V sharpens out on the final sew so I considered this one fine =)

Now is the time to cut through the main bodice at the point until your stitching line. I find it always comes out nicer if I do this AFTER basting the band in. (Don’t mind my threads, I’m terrible for trimming and removing them, usually that’s my partners job before we leave the house.)

Our next step is sewing the neckline. I’m going to do this on my serger, but I’ve done many on my sewing machine. I like the lightning stitch!
Match your quarter pins and start sewing from the point of the V.


Once you get started, stretch to fit between your quarters until you get to your last pin/clip before the other side of the V. For the last bit you’ll continue to stretch but you’ll want to sew right off the other side, closing off your “loop” with a point at the V.

At this point I take a look to see if it’s straight and even. This one was not so I did another line of stitching to even it out on one side. Usually that solves it for me, since the baste already had it nicely lined up.
P.s. unless you’re writing a blog post and taking really close up pictures, only you’ll see that it’s a millimeter crooked once you’re almost done writing and already uploaded all the photos. Most folks won’t notice and I promise it still looks great on y’all!


Now it’s time to finish the shirt as per the instructions and then enjoy your new fancy V-Neck!

Fun fact: these legging are the MyFit riding tights.

Thanks for sewing with me!
- Kea
Join us in our Facebook Group or tag us on Instagram so we can see how you utilize Apostrophe Patterns to make your creations.
// ]]>