

Recently someone from our testing team asked if we could make a pattern for Leggings with no front crotch seam. It got me thinking- I bet I could hack that. Maybe someday we will get an actual pattern generator for leggings like these but in the meantime- let's see if we can do it together. I used the MyFit Leggings as the base for this hack. I think it could be done with the MyFit Riding Tights too, but that's a hack for another day.
I generated and printed a pair of MyFit Leggings custom to my measurements and fabric stretch. I chose the wide side panel with high pocket with a 5" contour waistband.
(Did I misspell my own name when I saved my pattern? Sure did. lol)
We are going to be drawing a new inseam and removing a section from the front and back inseams. Then drawing a new long gusset to replace the missing section of fabric. The new gusset will go from knee to knee. The image below shows the front and back leg pieces only, the side panel and pocket pieces won't be affected by this hack.

In the Generator screens there is a page for crotch extensions, I used my front crotch extension number as a guide for determining how far up the front crotch rise to start the gusset. The crotch extension tells me how much of the crotch curve is between the legs, under the body.

My crotch extension in front is 2.375". I didn't want the gusset to start too far up the crotch curve, so I subtracted.5" from my crotch extension and measured 1.875" from the crotch point up the curve. This became my start point. The end point for the gusset is at the knee notch.
Draw a curved line to connect the gusset start point with the knee notch. The gusset should taper into the knee notch.

From the start point of the gusset, we now need to extend the front at the rise seam and draw a straight line to create the center fold for our front piece.
In the image below, the dot represents the place we measured to using the crotch extension. It is the start point for the new inseam. Draw a straight line that starts at the start point you marked in the rise, parallel to the grain line. Extend the top edge of the leggings to meet the new straight line you have drawn. Label the straight line with a fold marking so you don't forget to cut on the fold. These lines are represented in black below.

Onto the back: The new gusset should not take up so much of the back crotch curve that the gusset becomes visible when looking at the back. So we will use the triangle gusset lines to make sure the gusset does not extend too high. I have marked the tip of the triangle gusset for the starting point of my new inseam. The end point will be at the knee notch that will already be marked on your pattern.

Draw a curved line that connects the point at the end of the triangle gusset to the knee notch, the new curved line should taper into nothing when it reaches the knee notch. It will look very similar to what you have drawn on the front pattern piece.
To determine the measurements for the gusset:
To determine the length, measure the length of the new curved lines for front and back. (Pictured below.)
To determine the width of the gusset at the center fold, measure from the original crotch point to the line where the new inseam starts.
Cut down the line you have drawn for the new inseam to remove that section of the pattern piece from the front and back inseams, the removed sections of the pattern can be discarded.

Here are the measurements for my gusset.

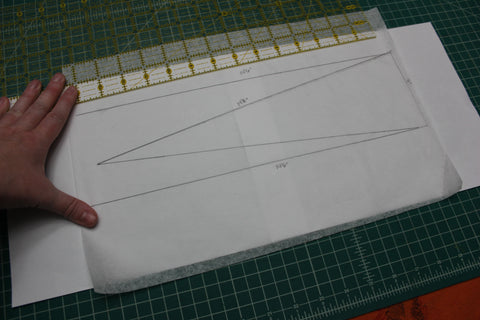
Add the two width measurements together, mine were 1 7/8 + 2 1/8, which came out nicely to 4". My longest length measurement was for the back and measured 14 1/8". To start drafting my gusset, I drew a box that was 14.5" long and 4" wide.

I need to draw a line for the gusset back. For me, this line should 14 1/8" long. I angled my ruler so that the line would go from one corner to the middle of the box at other side.

Using the end of the gusset back line as my starting point, I angled the ruler to meet at the bottom line of my box. This line needs to be 13 5/8", so it will not reach back to the right corner of my box. That is ok. Draw your line starting at the left point and finishing at the bottom line of the box.

Your gusset should now look like this. We will next connect the two lines that are on the right.
Connect the point for the back gusset line to the front gusset line. The ruler will need to be angled slightly. The new line should still measure the same amount as the previous width, in my case 4".

Here is the new gusset, Add a fold marking at the straight line for the width and draw a grainline arrow parallel to the fold line. The new gusset is the triangle you have drawn. The box we used for drafting can now be ignored.
Gusset will be Cut 1 on the fold. The measurements we took before were only for one leg, cutting on the fold ensures the gusset is long enough to go from knee to knee.
You will notice that I am not adding any seam allowances to the gusset. That is because I didn't remove any seam allowances earlier so they are already calculated when we took our measurements.

Sewing Instrutctions:
Follow the pattern instructions until you get to the inseam. (Sew the Side panel with or without pocket, Sew the side seams, sew the back crotch seam.)
Your leggings should now be connected to each other at the sides, but the inseam is unsewn.
Make sure that your knee notches are still marked on your front and back legs. Mark them again if need be. Mark the center front of your front legs piece. Find the center front and center back of your gusset. Center back is marked with two clips in my picture.

With right sides together, clip your gusset to the center back crotch seam of your leggings at the center back of the gusset.

Continue to pin the gusset to the back leg, matching the end of the gusset to the knee notch. Once gusset is pinned into place along the whole length, sew using your selected seam allowance.

Once the gusset is sewn to the back leg, match the gusset front center to the center front of the pant, with right sides together. Match the gusset ends to the knee notches on the front leg. Press the seam from the gusset back towards the new seam you will be sewing.
Match the remainder of the inseam and pin or clip into place. Sew the entire inseam from ankle to ankle using your selected seam allowance. Make sure that the seam at the gusset ends is fully captured in the new seam.

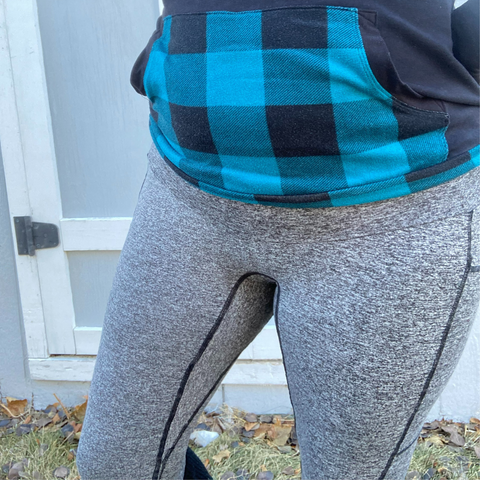
That's it! Continue to the instructions for your selected waistband and ankle finishing and your new leggings, with long gusset and no front seam, are finished!

This was a really fun hack to work through and I am so happy with the results. I also like the long gusset-I've never made a pair with a long gusset before, consider me hooked. I topstitched with a reverse cover stitch on my pair to make the new seams really stand out in pictures, but that's an optional step.
The method detailed above would work for creating a long gusset even when you don't need a seamless front. Just skip the step where you create a new fold line for the front leg piece. Sew that inseam as normal right after sewing the back inseam. Gusset installation stays the same too.
Thanks for joining me today,
Cyn
Join us in our Facebook Group or tag us on Instagram so we can see how you utilize Apostrophe Patterns to make your creations.