


One of my favorite things about the MyFit Patterns is how customizable they are. I set out to use the MyFit leggings pattern to make a custom wrist sleeve. I often need to wear a wrist brace and having a sleeve on underneath is a great way to protect my nerves and skin.
I started off taking some measurements of my hand and arm. I thought that the rise part of the leggings would work well in the valley between my forefinger and thumb.


The "waist" measurement is taken at the knuckle at the bottom of the finger. Marked W. Use the split measurement option and put the full measurement into both boxes.
The "hip" measurement is taken at the base of the valley between the forefinger and thumb. Marked H. Use the split measurement option and put the full measurement into both boxes.
*Since we are using one "leg" for each hand, the waist and hip circumferences need to be doubled so that each leg will have enough width to encircle the hand. This is accomplished by entering the full measurement into each split measurement box*
On the next screen, select "Capri" when asked how long you want your leggings.
The "thigh" measurement is taken just below the lowest knuckle on the thumb. Marked T.
The "knee" measurement is taken at the wrist. Marked K.
The "calf" measurement is taken at the end point for your wrist guard. Marked C.
For the inseam measurements, crotch to knee will be the Hip to knee, and crotch to hem will be from hip to calf.
Crotch depth was taken from waist to hip, as a straight measurement.
Crotch Rise was taken following the curve from my hip to knee marking. There was not a lot of difference between the two, that will work fine for the wrist guard.
For waistband style, Select elastic. I said I was using 1" elastic, but I will not be adding any.
For fit: Snug.
Panel: Choose Side Seam

These are my finished measurements. Save and then download, I like to always download a projector or A0 copy to preview what my pattern will look like.

Looks good! Use the previous button to go back and select your preferred download method. I downloaded and printed a letter file. As you can see, my inseam lines aren't straight-that is great on leggings when accounting for different shaped legs, but it was unnecessary for the wrist guard, so I straightened the lines.

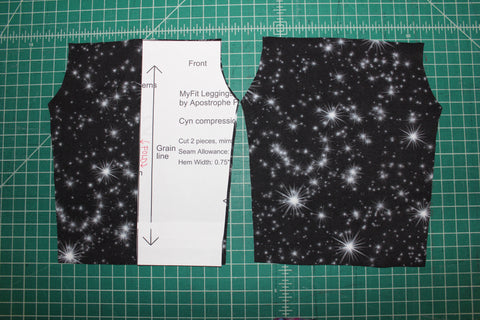
You'll notice that I have a front and back piece generated, we are only going to use the Front piece, It will be cut on the fold. Cut 2.
For comfort and based on how my nerves in my hands react to things, I need my seams to be on the outside, and the pictures will follow that. If seams aren't an issue for you, your seams can be on the inside. Just make sure to use right sides together.

I have pinned and clipped to show the construction. Following your chosen seam allowance, sew down the clipped sides with a stretch stitch or you may choose to serge. Then, start at the top of the rise, and following your chosen seam allowance, sew to the double pins. The double pins to the seam on the clipped edge is the opening for your thumb. I left open 1", which ends up being a 2 inch opening.

I used white thread to make the stitching visible. At this point, if your seams are on the outside you can choose to carefully fold the seam allowance to one side and topstitch with a stretch stitch or coverstitch, and to hem the top and bottom edges with a stretch stitch or a coverstitch.
My fabric is an athletic knit so I opted not to hem. The athletic knit will hold up and for my purposes, I wanted to eliminate any extra bulk. I also opted not to topstitch my seam allowance for the same reason.


Repeat for the other side, and you have your own set of wrist sleeves.
I hope you'll share any that you make with me in the Apostrophe Patterns Facebook group.
Thanks for joining me today! ~Cynthia
***The content of this blog post is not intended to be a substitute for professional medical advice or equipment.***